Nav2 - ROS 2 Navigation Stack
Nav2 is the navigation stack for mobile robots designed for ROS 2. This package is considered both in research and as well as in industrial applications because of the modularity and the wide range of algorithms that it provides to the user. Nav2 is still considered as an evolving project and new features can be expected every fortnight.
In this tutorial, we just explain on how Nav2 is used in our robots. We encourage the users to check out the detailed official Nav2 documentation page for understanding the concepts surronding it.
Attention
In this tutorial for the sake of generality, we will be using neo_m(?)_(?)00 for the MP series. Please fill in with your own robot. For the case of simulation use neo_simulation.
Attention
The namespacing support is not yet avialble for the ROX series.
Mapping
Map is one of the essential component representing the environment based on which the planning algorithm will be able to plan the path for the robot.
For creating a map, we use the slam_toolbox.
Creating map
Note
Depending on the requirement, the mapping parameters can be changed under ~/your_workspace/src/neo_mp(?)_(?)00/config/navigation/mapping.yaml for MP series and ~/ros2_workspace/src/rox/rox_navigation/configs/mapping.yaml
Start creating the map with the following commands,
Without namespace:
- For Classic Gazebo:
ros2 launch neo_simulation2 mapping.launch.py
Launch Argument:
'param_file':
    Param file that needs to be used for navigation, sets according to robot by default
    (default: '~/your_workspace/install/neo_simulation2/share/neo_simulation2/configs/your_robot/mapping.yaml')
- For MP series robots (real hardware or Modern Gazebo):
ros2 launch neo_m(?)_(?)00-2 mapping.launch.py
- For ROX series robots:
ros2 launch rox_navigation mapping.launch.py
With namespace:
ros2 launch neo_m(?)_(?)00 mapping.launch.py robot_namespace:=robot1
Warning
Do not close the launch until saving the map.
Attention
The namespacing support for mapping is currently only available in MP-400.
Launch RViz to visualize the created map
Without namespacing:
ros2 launch neo_nav2_bringup rviz_launch.py
With namespacing:
ros2 launch neo_nav2_bringup rviz_launch.py use_namespace:=True namespace:="robot1"
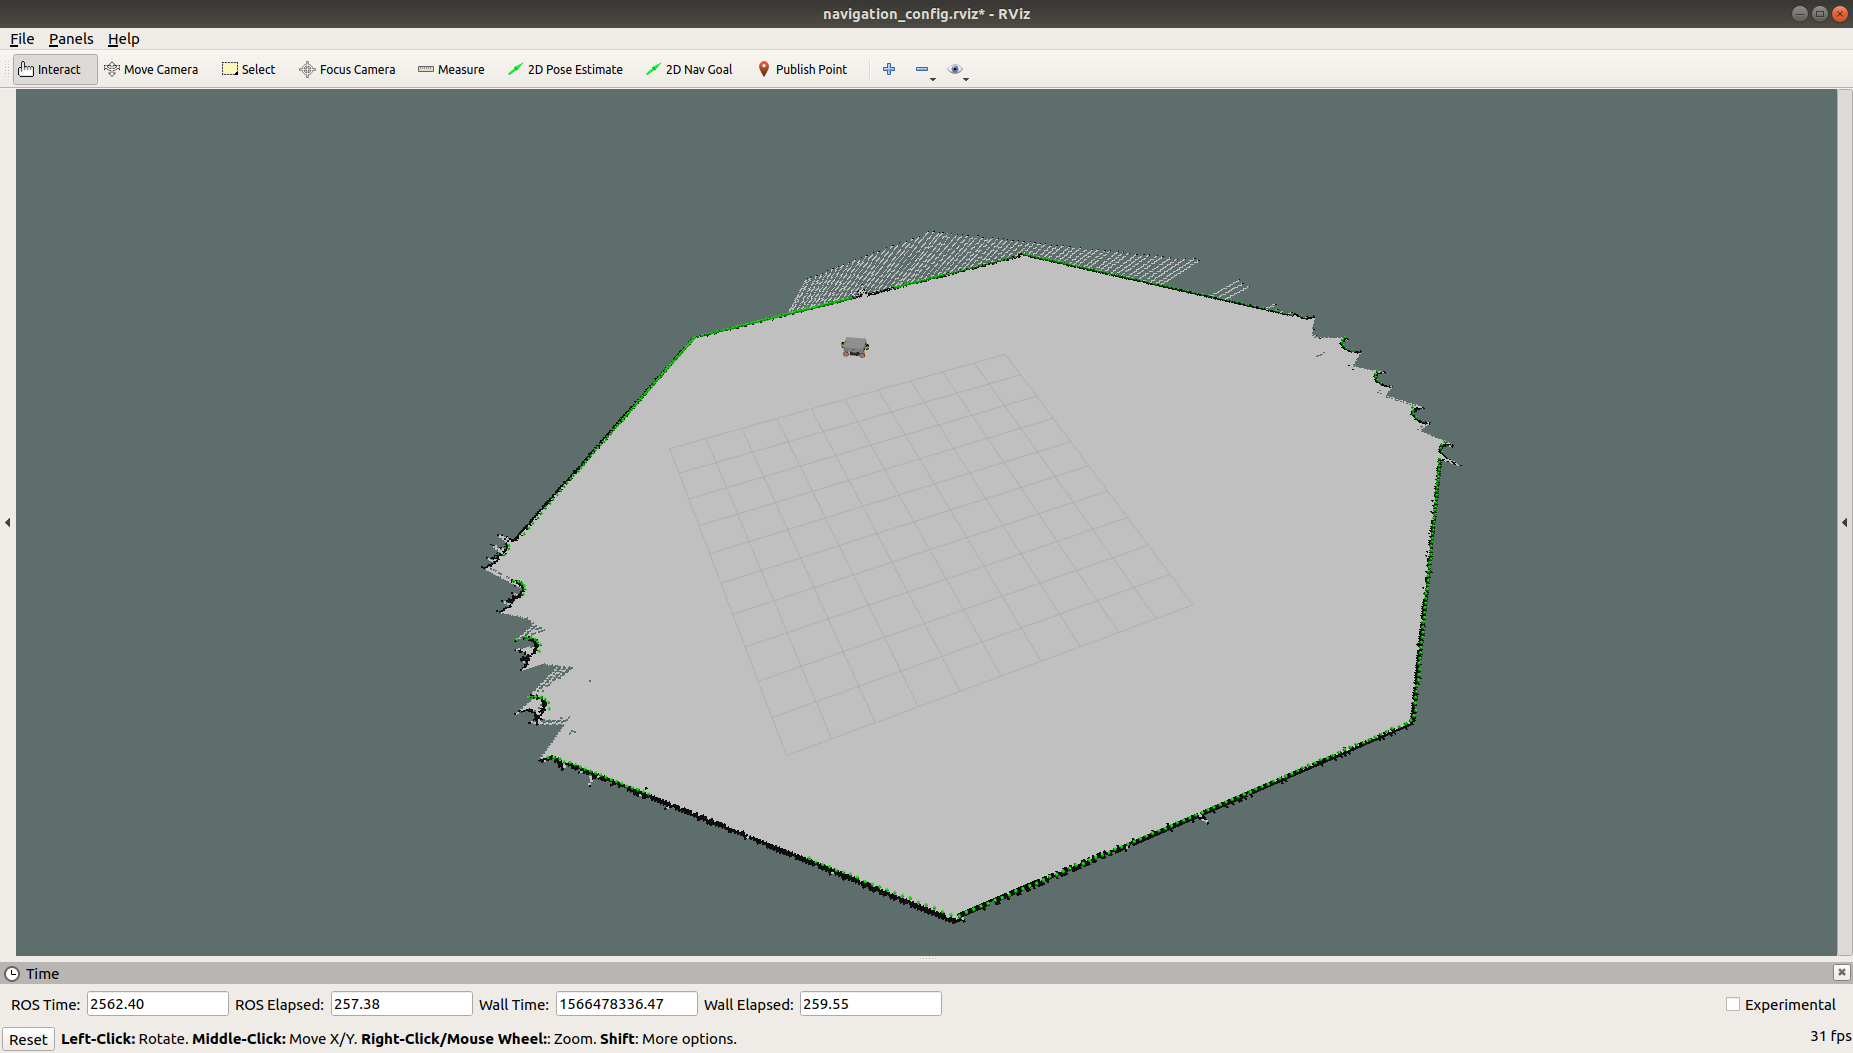
- After starting the mapping, in the RViz, the initial stripes of the maps can be found as shown in the image below:
- Navigate the robot around the environment, in order to further build the map.
- Here is an example of a completely built map in our simulation:
Saving map
To save the map, use the following command
- For MP series robots:
ros2 run nav2_map_server map_saver_cli -f ~/to_your_workspace/src/neo_m(?)_(?)00/configs/navigation/maps/your_map_name
- For ROX series robots:
ros2 run nav2_map_server map_saver_cli -f ~/ros2_workspace/src/rox/rox_navigation/maps/your_map_name
- In the map folder, two essential files are created
- your_map_name.pgm
- your_map_name.yaml
Once the files are created, it’s always essential to rebuild the package, in order for the maps to be installed and available during the run time. If not built, ROS will not be able to find the newly created map.
Autonomous Navigation
In order for the robot to autonomously navigate, we require three important components:
- Localization
- Planning
- Control
We have a single launch file and a single config file that brings up all the above necessary components.
Before starting the navigation, it is essential to utilize the newly created map for navigation. For this there are 2 ways to go about.
A default map for the robots’ environment can be set. For this,
In case of MP robots, please go to ~/to_your_workspace/src/neo_m(?)_(?)00/launch/navigation.launch.py and change the default value under the map_dir variable.
In case of ROX robots, please go to ~/ros2_workspace/src/rox/launch/navigation.launch.py and change the default value under the map_dir variable.
Once done, the navigation can be initiated from the commandline by running:
Without namespacing:
- For Simulation in classic Gazebo:
ros2 launch neo_simulation2 navigation.launch.py
Arguments (pass arguments as '<name>:=<value>'):

    'map':
        Available maps: "neo_track1", "neo_workshop" or specify full path to your map
        (default: 'neo_workshop')

    'param_file':
        Param file that needs to be used for navigation, sets according to robot by default
        (default: '')

    'use_multi_robots':
        Use multi robots "True/False"
        (default: 'False')

    'use_amcl':
        Use amcl for localization "True/False"
        (default: 'False')

    'use_sim_time':
        Use simulation clock if true "True/False"
        (default: 'True')

    'robot_namespace':
        Top-level namespace
        (default: '')
- For MP series robots and Modern Gazebo:
ros2 launch neo_m(?)_(?)00-2 navigation.launch.py
The argument list are as follows:
Warning
Note, only selected parameters are available for certain robots.
Attention
use_legacy argument is available only for MPO-500.
Arguments (pass arguments as '<name>:=<value>'):

'use_sim_time':
    Use simulation clock if true
    (default: 'False')

'autostart':
    Automatically start the nav2 stack
    (default: 'True')

'robot_namespace':
    Top-level namespace
    (default: '')

'use_multi_robots':
    Use multi robots
    (default: 'False')

'head_robot':
    Head robot
    (default: 'False')

'use_amcl':
    Use AMCL
    (default: 'False')

'map':
    Full path to map file to load
    (default: '/home/pradheep/rolling_ws/install/neo_mpo_700-2/share/neo_mpo_700-2/configs/navigation/maps/neo_workshop.yaml')

'nav2_params_file':
    Full path to the Nav2 parameters file to load.
Leave empty to use the default file based on the robot type
    (default: '')

'use_rviz':
    Launch RViz for visualization
    (default: 'True')

'use_legacy':
    Sets the footprint to legacy mode
    (default: 'False')
- For ROX series robots:
ros2 launch rox_navigation navigation.launch.py
Note
use_sim_time argument needs to be set to True if you are using Gazebo
The argument list are as follows:
'frame_type':
    Frame type - Options: short/long
    (default: 'short')

'rox_type':
    Robot type - Options: argo/diff/trike/meca
    (default: 'argo')

'use_sim_time':
    Use simulation clock if true, if you use modern / classic gazebo
    (default: 'false')

'autostart':
    Automatically start the nav2 stack
    (default: 'true')

'robot_namespace':
    Top-level namespace
    (default: '')

'use_multi_robots':
    Use multi robots
    (default: 'False')

'head_robot':
    Head robot
    (default: 'False')

'use_amcl':
    Use AMCL
    (default: 'False')

'map':
    Full path to map file to load
    (default: '/home/neobotix/ros2_workspace/install/rox_navigation/share/rox_navigation/maps/neo_workshop.yaml')

'nav2_params_file':
    Full path to the Nav2 parameters file to load
    (default: '/home/neobotix/ros2_workspace/install/rox_navigation/share/rox_navigation/configs/navigation_short_frame.yaml')
Please check the rox_navigation for more information
With namespacing:
ros2 launch neo_mpo_700-2 navigation.launch.py namespace:="robot1" use_multi_robots:=True head_robot:=True params_file:=install/neo_mpo_700-2/share/neo_mpo_700-2/configs/navigation/multi_robot_navigation.yaml
Launch RViz
Without namespacing:
ros2 launch neo_nav2_bringup rviz_launch.py
With namespacing:
ros2 launch neo_nav2_bringup rviz_launch.py use_namespace:=True namespace:="robot1"
Localize the robot
By default we use neo_localization for localization. In order to localize the robot press the “2D Pose Estimate” button and select the robot location on the map.
Sending goal(s) for the robot
In order the robot to start navigating autonomous a goal position needs to be defined. Assuming the goal position is given, Nav2 uses the planner to find an optimal path for the robot to the goal location. A controller is deployed by Nav2 for the robot to follow the path.
There are different ways to give the goals for the robot, here we will just explain some of them to get started:
Sending a single goal
In order to send just a single goal, press the “Nav2 goal” button and select the desired goal location on the map, as shown in the GIF below:
Sending multiple goals
For the people who are interested in sending multiple goals to the robot, No problem! Navigation2 provides a waypoint-following plugin, which would allow us to select multiple goals. For the ease of the user, we have already configured this plugin and ready for use.
In order to select the multiple goals. First, press the “Waypoint / Nav Through Poses Mode” button. The again as same as selecting a single goal, press the “Nav2 goal” button to select your goal location.
Note that, before selecting each goal, it is required to press the “Nav2 goal” button.
Note
If you would like to implement you waypoint following in Cpp, then please checkout the neo_waypoint_following .
Namespacing
More about the Navigation namespacing can be read under Namespacing Guide.
Change parameters and algorithms
There are different algorithms and corresponding parameters as part of the Navigation2 stack. These parameters can be found under ~/your_workspace/src/neo_mp(?)_(?)00/config/navigation/navigation.yaml for MP Series robots.
For the ROX robots, please find all the parameters under ~/ros2_workspace/src/rox/rox_navigation/config/, over there you can find 2 files, one pointing to the omnidirectional robot and other to the differential robot.
Please edit the files according to your robot type.
| Parameters | Default | Options |
|---|---|---|
| Planner | NavFn | SMAC Planner |
| Controller | neo_local_planner | neo_mpc_planner2, nav2_rppi_controller |
| Localization | neo_localizaiton | AMCL |
All the home-brewed algorithms are explained in the section packages. More information about the options specified in the above table can be found in this navigation plugins page.
Changing Behaviors
Behavior tree is one of the key core concepts that have been adapted into the Navigation 2 stack. Behavior trees in the Nav2 stack provides the user to easily develop and customize various behaviors that the robot should exhibit. Each behaviors are developed as an individual component and then is integrated into the behavior tree. Thus the behavior tree, provides us with a flexible development environment for solving a particular problem at hand.
By default, all the robot packages carry behavior trees, that is customizable according to the application needs. The behavior trees can be found under ~/your_workspace/src/neo_mp(?)_(?)00/config/navigation/behavior_trees for MP robots and to ~/your_workspace/src/rox/rox_navigation/config/behavior_trees for ROX.
navigating_to_a_pose behavior tree is for all the tasks that requires the robot to navigate in free space from point A to point B. Whereas navigate_through_pose behavior tree is for the tasks that requires to robot to navigate through set of intermediary hard pose constraints in order to reach the goal location
Note
More information on behavior trees can be found here. Examples of behavior_trees can be found here.